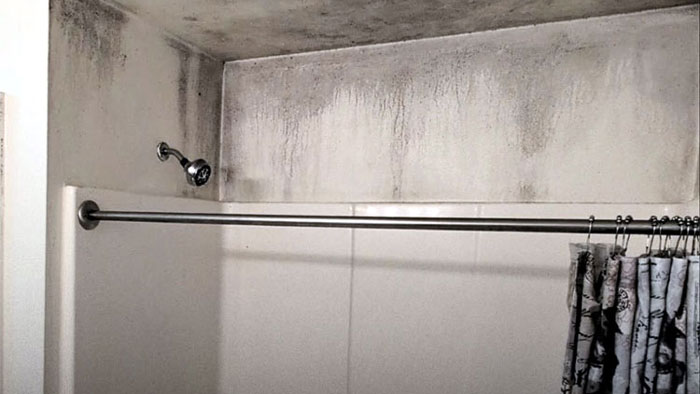
When those black streaks start creeping along the grout or tiles, your bathroom can quickly feel like a biohazard zone.
Mould does not just make your morning routine less relaxing. It also quietly damages your walls, ceilings, and air quality. Before you know it, that musty smell will become part of the ambience.
Luckily, all it takes is some consistent upkeep to stop mould in its tracks and keep your bathroom clean, hygienic, and looking its best.
Why Bathrooms Are Mould Magnets
Mould thrives in warm, damp spaces, and the steam from the shower, combined with splashes from the sink and limited ventilation, makes them the perfect breeding ground for those pesky spores.
Add soap residue, traces of shampoo, and wet towels, and you will have given mould everything it needs to move in permanently.
It often attacks grout lines, window seals, tile edges, and silicone joints. Understanding where and why it appears is half the battle. Once you know its favourite hiding spots, you can plan your defence accordingly.
Choose the Right Cleaning Products
To win the battle against mould, you need the right cleaning arsenal. Commercial mould removers are your best bet.
They contain active ingredients designed to break down spores and prevent regrowth. Just make sure to follow the label directions carefully to achieve the desired results without damaging your bathroom surfaces.
If you would rather take a gentler, eco-friendly route, a basic mixture of baking soda and white vinegar will do the trick. The vinegar’s mild acidity helps loosen mould, while baking soda absorbs odours and excess moisture.
Simply apply it, let it sit for a few minutes, then scrub lightly and rinse with warm water. But before you roll up your sleeves, remember to put on gloves, goggles, and a mask, as those unsightly spores can irritate your skin and lungs.
Maintain a Consistent Cleaning Routine
Mould doesn’t stand a chance against a well-planned cleaning routine, so set aside a few minutes each week to tackle any areas prone to dampness. These usually include shower doors, tiled corners, window frames, and cornice moulding.
A specialised cleaner or diluted white vinegar will do the trick. Just make sure to go over those tiny crevices where moisture tends to linger, then dab each area dry with a microfibre cloth.
To make your life easier moving forward, keep a small squeegee handy to clear condensation from the shower walls after each use. It is a small habit that pays off handsomely.
Improve Airflow and Ventilation
Proper ventilation is just as important. After a hot shower, all that steam has to go somewhere. If it is trapped, it is only a matter of time until you start seeing signs of damp creeping in.
An extractor fan is your best line of defence here. To clear excess humidity, run it for at least 15–20 minutes after every shower, and don’t forget to clean the fan every couple of months to keep it running efficiently.
If you don’t have one, crack open a window or door slightly to allow fresh air to circulate. For windowless bathrooms, consider installing a humidity-sensing fan that switches on automatically when moisture levels rise.
Keep Moisture in Check
Effective moisture control is the secret to stopping mould before it starts. Silica gel packets or moisture-absorbing crystals are a simple, discreet way to reduce dampness in enclosed areas, like under-sink cupboards.
To save yourself the hassle later, you should also make it a habit to check the taps, showerheads, and pipes regularly for leaks. This also applies to worn-out grout or cracked tiles.
Even a slow drip or small fracture can create the perfect breeding ground for fungus if ignored. So, if you spot water pooling or discolouration around fittings, have a professional handyman take a look at them before they cause serious water damage.
For notoriously humid spaces, a compact dehumidifier can save the day. By quietly extracting moisture from the air, it will leave your bathroom fresher and easier to maintain.
Seal Grout and Caulk Properly
Unsealed grout and caulk essentially act as small trenches for water, absorbing moisture like sponges and providing a cosy home for mould. To block off these access points, start by cleaning the area thoroughly to remove dirt and soap residue.
Once dry, apply a high-quality sealant to the grout lines and silicone joints using a steady hand and a small brush to ensure even coverage. Then, give it at least 24‒48 hours to dry fully before using the shower again.
As a rule of thumb, you should reseal these areas every six months or so. This quick and easy task adds years to your tiles and helps keep your bathroom looking bright and polished.
Upgrade to Mould-Resistant Materials
If you are planning a bathroom renovation, this is your chance to incorporate mould prevention into the design with materials that naturally repel moisture.
For example, mould-resistant plasterboard and anti-fungal paint are ideal for damp environments. High-quality waterproof tiles and vinyl flooring also help make home maintenance more manageable in the long run.
When in doubt, don’t hesitate to consult a certified handyman or contractor. They can recommend the best materials based on your bathroom’s layout and ventilation setup, ensuring your upgrade is both stylish and practical.
Tackle Existing Spores Safely
If you do notice small mouldy patches, despite your best efforts, do not wait for them to settle in.
Mix equal parts water and vinegar in a spray bottle and apply it directly to the affected area. Then, let it sit for up to an hour before scrubbing it gently with a stiff-bristle brush.
Once the spores are gone, rinse the area again, then dry it thoroughly. If they return or spread even further, it is best to seek professional cleaning help.
Trained specialists have the right tools and treatments to remove mould safely without damaging the surface beneath. They can also identify the underlying causes of recurring regrowth, such as hidden leaks or poor ventilation, to stop the problem once and for all.
Conclusion
A mould-free bathroom is not just easier on the eyes. It is better for your health and peace of mind, too.
With a few smart habits and a simple cleaning routine, you can say goodbye to those black streaks and musty smells once and for all.
Think of it as giving your bathroom a reliable armour, one that keeps it sparkling, fresh, and hygienic all year round.

